
How to Roll a Cone for Consistent Airflow and Even Burn
Rolling a cone looks simple, but doing it well takes control and attention to detail. The shape affects airflow. The packing affects the burn rate. Even small imbalances can lead to uneven burning, tight draws, or wasted material. A properly rolled cone feels stable in the hand and burns smoothly from base to tip.
Cone quality matters even more as pre-rolls continue to grow in popularity. According to market data from Headset, pre-rolls consistently rank among the top-selling cannabis product categories across legal markets in the United States. As demand increases, consistency in rolling and filling becomes more important for both personal use and production environments.
A cone is different from a straight joint. It requires a firm filter base, gradual filling, and controlled packing to maintain structure. Rushing early steps often leads to airflow problems later. When each stage is handled carefully, the result is a cone that holds its form, burns evenly, and delivers a more comfortable experience.
This guide breaks down the materials you need, the step-by-step rolling process, and practical tips that make cone preparation more consistent, whether you are rolling by hand or preparing cones at higher volumes.
Basic Things Needed To Roll A Cone
Rolling quality often depends less on technique and more on preparation. When the right basics stay within reach, control improves, and small issues become easier to manage before they affect the final cone.
These basics help keep the process controlled and consistent.
Rolling Papers or Cones
Rolling papers or cones form the outer structure, so size and quality matter from the start. Wider papers allow better control over shape, while pre-made cones reduce handling and help maintain uniform form. Many people assume paper choice has little effect, but thin and consistent paper supports better airflow and sealing. In production-focused environments, using the same paper type across batches improves repeatability and reduces variation.
Paper choice affects:
cone shape and stability
airflow and burn consistency
uniform results across multiple cones
Grinder and Flower Preparation
Flower preparation affects nearly every step that follows. Different flower types, including sativa, indica, and hybrid, can vary in density and texture, which makes consistent preparation important. Large pieces can block airflow, while very fine material can make the cone feel tight. A grinder helps create a balanced texture so the flower settles naturally inside the cone. This reduces the need for heavy packing later and supports predictable results, especially when preparation happens repeatedly.
Proper preparation helps:
maintain even airflow
reduce packing issues
support consistent cone quality
Filter Tips or Crutches
Filter tips or crutches add structure to the base of the cone and make handling easier while filling and packing. They help the cone hold its shape and prevent collapse near the mouth end. Some believe filters only improve comfort, but they also support airflow and consistency. Using the same filter size helps reduce variation, especially when cones are prepared in higher numbers.
Filters contribute to:
cone stability during filling
steady airflow
consistent size and structure
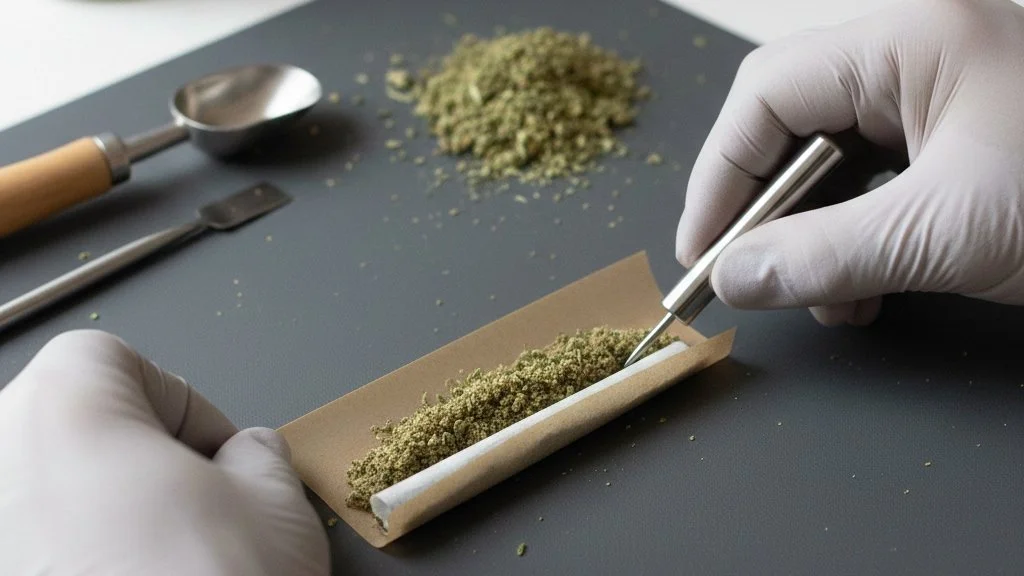
Simple Packing Tools
Packing tools allow controlled pressure without damaging the paper or compressing the material too tightly. Fingers alone often create uneven density, which affects airflow. Simple tools help pack in stages, keeping the cone balanced from base to tip. In repeatable workflows, controlled packing reduces rework and improves overall quality.
Packing tools help:
apply even pressure
Protect the cone structure
support reliable results

Steps Used During the Cone Rolling Process
Cone quality improves when the process follows a clear and steady order. Each stage builds on the previous one, so attention at the right moment helps avoid correction later and supports consistent results.
Preparing the Filter
The filter sets the foundation for the entire cone. Many people shape the filter by folding a small “M” symbol at one end before rolling it into place, which helps maintain airflow and structure. When the filter feels firm and evenly shaped, the rest of the cone becomes easier to manage. A loose or uneven filter often leads to collapse during filling or packing, which makes this step more important than it first appears.
Grinding the Flower
Flower preparation affects nearly every step that follows. Large pieces can block airflow, while very fine material can make the cone feel tight. A consistent texture helps the flower settle naturally inside the cone. This reduces the need for heavy packing later. When preparation feels balanced, filling becomes smoother, and results stay more predictable. Good preparation also helps reduce waste and avoid uneven burn.
Filling the Cone
Filling works best when it happens gradually. Adding too much at once often creates uneven spots that are difficult to fix later. Starting near the filter and moving upward helps the cone take shape naturally. Gentle placement allows the flower to settle without pressure. This stage is more about balance than volume. When filling feels controlled, the cone usually holds its shape without effort.
Packing for Even Airflow
Packing should help the flower settle, not compress it. Light pressure applied in small stages works better than pushing everything down at once. After each press, airflow should still feel open. Overpacking is one of the most common mistakes and often leads to drawing problems. Controlled packing supports consistent airflow and makes the cone more comfortable to use.
Shaping and Sealing the Cone
Once filling and packing feel right, shaping becomes simple. Light rolling between the fingers helps smooth the surface and correct small uneven areas. Sealing the paper secures the structure and keeps everything in place. The final twist at the tip protects the fill and maintains shape. When this step feels calm and controlled, the cone usually holds together well.
Tips That Make Cone Rolling Easier
Experience develops through small adjustments rather than major changes. Simple habits often reduce effort and help the process feel more natural over time, especially during early practice.
Taking Your Time While Learning
Cone rolling improves with patience rather than speed. Moving too quickly often causes uneven shape or loose fill that becomes harder to fix later. Slowing down allows you to adjust as you go and understand how the cone responds to each movement. Over time, this steady approach helps build confidence and reduce mistakes.
Using Pre-Rolled Cones
Pre-rolled cones can reduce early frustration by removing the need to shape the paper. This allows you to focus on filling and packing without worrying about form. They are commonly used when consistency is preferred or when learning hand control. Using pre-rolled cones does not replace skill development, but it can support learning.
When Small Tools Can Help
Small tools can assist with gentle packing and placement, especially when finger control feels limited. They help apply even pressure and reduce the chance of tearing paper. Using tools supports accuracy, but careful handling remains important. Overreliance on force can still affect airflow and structure.
Common Mistakes When Rolling a Cone
Even after learning the basic method, small habits can still affect the outcome. These mistakes often feel minor at first, but they influence airflow, comfort, and burn quality. Understanding where problems usually appear helps reduce rework and improves confidence over time.
Overpacking and Airflow Problems
Overpacking usually starts with the belief that tighter means better. When a cone feels soft, extra pressure often seems like the solution. In reality, excess pressure reduces airflow and makes the draw feel restricted. A cone needs structure, not density. If airflow feels tight before closure, the issue already exists. Light pressure allows material to settle naturally without collapse.
A balanced cone often shows these signs:
Air moves freely from the filter to the tip
The cone feels firm but not rigid
Pressure leaves no hard spots
Small corrections early support comfort and prevent frustration later.
Uneven Fill and Burn Issues
Uneven fill rarely fixes itself after closure. When material gathers more on one side, heat follows that path first. This leads to uneven burn and wasted material. The issue often begins during fill, especially when attention shifts away from visual balance. A cone should look centered and uniform before the final seal.
This problem often appears when:
Cone tilts during fill
Material settles without adjustment
Visual checks feel unnecessary
A brief pause to check the balance often saves the cone from poor results.
Moisture and Grind Consistency
Material condition plays a quiet but important role in cone quality. A very dry flower may burn too fast, while excess moisture can limit airflow. Texture also matters. Large pieces create gaps, while a very fine texture restricts air movement. Balanced texture supports even settlement without pressure. Attention to feel before use prevents problems that rarely correct themselves later.
Good material usually feels:
Even in texture
Flexible without dampness
Consistent throughout the batch
Care at this stage supports stability and predictable results.
The Small Habits That Protect Cone Quality
A cone that burns evenly does not start at the moment of sealing. It starts with the habits surrounding preparation. Control over airflow and structure depends on more than rolling technique. It depends on how carefully the space, tools, and process are managed from the beginning.
Keep the Workspace Intentional
Surface condition directly affects consistency. Loose material, dust, or leftover fragments can shift how the cone fills and settles. Even small debris can create uneven density if it mixes into the batch unnoticed. A clear surface improves visibility, supports balanced filling, and reduces interruptions during shaping and packing.
Organization also plays a quiet role in repeatability. When tools remain in the same place and materials are easy to access, movements stay steady and deliberate. This reduces rushed adjustments that often lead to tight spots or uneven burn paths.
Apply Pressure With Control
Tools should guide the material, not force it into place. Excess compression restricts airflow and changes how heat travels through the cone. Once airflow is compromised, correcting it becomes difficult without reopening and rebuilding.
Controlled packing in small stages allows the flower to settle naturally. The cone should feel structured but still breathable. When pressure remains even from the filter to the tip, airflow stays open, and burn remains steady. Calm, consistent handling reduces the need for correction later and protects the shape you worked to build.
Stay Aware of Where Preparation Takes Place
Preparation does not happen in isolation. Local regulations may influence where cones can be rolled or filled, especially in shared or commercial environments. Staying informed avoids disruptions that can interrupt workflow or delay production.
Clear boundaries support long-term consistency. When preparation happens in permitted settings, attention stays focused on quality rather than compliance concerns. Stability in the environment supports stability in results.
Take Control of Cone Consistency at Any Scale
An even burn does not happen by chance. It comes from balanced grind, steady filling, and controlled packing that protects airflow from base to tip. When each step is handled with intention, cones feel stable, draw smoothly, and burn predictably.
At small volumes, attention to detail is enough to maintain that standard. As production grows, maintaining the same level of control becomes more difficult. Minor differences in density or fill distribution can quickly turn into uneven burn patterns across batches.
That is where structured systems make a difference. Automation solutions like Jiko and Stardust from Sorting Robotics help standardize filling, infusion, and coating processes. By reducing manual variation and stabilizing material handling, producers can maintain airflow consistency and structural integrity at higher volumes.
If consistent airflow and even burn are part of your product promise, your workflow needs to support it. Book a demo with Sorting Robotics today and see how you can bring repeatable precision into every cone you produce.
Frequently Asked Questions
Are rolling cones cheaper than buying pre-rolled cones?
Rolling cones by hand can cost less at small volumes because you only pay for materials. Pre-rolled cones usually cost more but save time and reduce waste. Cost difference becomes more noticeable as volume and labor needs increase.
Can you roll a cone with a rolling machine?
Yes, rolling machines and cone fillers can help shape and fill cones more consistently than hand rolling. These tools support uniform results and reduce manual effort, especially when preparing cones repeatedly or at higher volumes.
Do different cone sizes burn at different rates?
Cone size can influence burn behavior. Larger cones often burn longer due to more material, while smaller cones burn faster. Fill consistency and airflow usually affect burn rate more than size alone.
Should you pack a cone tightly or loosely?
A cone should feel firm but not tight. Packing too tightly restricts airflow, while loose packing causes uneven burn. Balanced pressure helps material settle evenly and supports smoother airflow throughout the cone.
What are the best pre-roll cones?
The best pre-roll cones use consistent paper, a reliable shape, and a uniform size. Quality cones reduce variation during filling and packing. Choice often depends on production needs, preferred size, and compatibility with filling tools or automated systems.